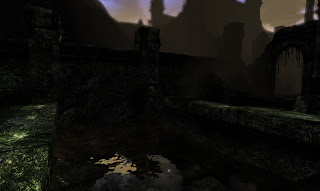
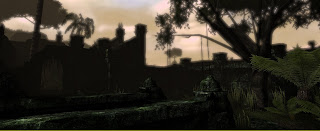
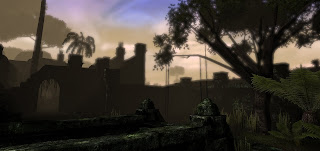
Today I finished my shader, I tried to build it with as much flexibility as possible. This shader will help with performance and save time in the future. When this shader is instanced the user can set the following options:
Optional Textures:
- Diffuse Texture
- Diffuse 2 Texture
- Diffuse Detail Texture
- Specular Texture
- Specular 2 Texture
- Normal Texture
- Normal 2 Texture
- Normal Detail Texture
- Mask Texture
All diffuse textures have colour, contrast, brightness and desaturation controls. All Specular textures have contrast and brightness controls. All normal maps intensity controls. The mask has colour, contrast, brightness and clamp controls. Each texture has their own UV coord settings and each texture can be turned off if not required.
Detail layer doesn't need a specular map, so to save memory I did not include it.
Another optional feature is rim lighting, which includes a falloff, colour and intensity controls.
The last feature is one of my favorites, by using the object world position and adding it the the texture coords the shader can offset the textures position. Controls include optional XY and/or Z movement depending if the user needs full or partial texture offset based on the objects XYZ movements. For example, a brick wall texture could be created so that it is seamless horizontally but not vertically, this could be intention due to additional texturing requirements utilizing the top or bottom piece of the texture, using my shader the user now has an object with the ability to texture offset horizontally without having to recreate the material.
Here's the overview of the shader in the material editor:
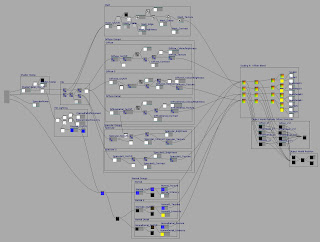
It's one of my largest shaders and my first truly flexible material using instancing. And here's all the options in the menu:
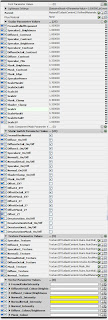
I have added the new shader to about half of the ruin objects, tomorrow I will finish the job. The new shader looks gd and improves the look of normals, I will post the results soon.
Tuesday, 30 March 2010
Monday, 29 March 2010
Level Design
Iv mainly been level designing for the past couple of days, as well as optimizing meshes by loding them and did a lot of lighting changes. I changed the lighting because I noticed the screenshots where rather dark on other computers, so I researched some lighting techniques and watched a lot of video tutorials and now I believe the lighting is coming a long very nicely. I added rim lighting effects to a lot of different meshs to bring out contours and to produce a cartoonier style effect. I will post some screenshots once I'v built the level.
Optimizing the game is a ever growing task, I'm now realising how important it is and have a lot of tricks up my sleeve to increase performance. One of those tricks it to build a shader which can be instanced between all the ruin objects, this will mean only one big shader has to be compiled, it will also mean I can re-use the shader for future projects veru easily. Again once I'v finished the shader I will give you a demo of it and some screenshots.
Friday, 26 March 2010
Colour changes.
Thursday, 25 March 2010
Ropebridge ingame.
Offsetting textures based on the world position offset.
Today I'm doing research into how we can make the ropebridge interactive, although in doing the research I'v come across a material expression which offsets textures based on the object position (something I thought would be great but never got round to looking into). Heres a screenshot of the nodes:
So today Iv gone through all the stone textures in which I added this expression. Now it's very difficult to see any repeating texures. :)
Wednesday, 24 March 2010
Foliage added.
Tower House
Monday, 22 March 2010
Tower sub-building
Today I've been texturing the building which joins up to the tower. It's going well having completed 7 different meshes that complete the interior of the building. Tomorrow I will finish the building base and the roof structures, I will then construct the stone courtyard and post some screenshot's.
Sunday, 21 March 2010
Tower
Saturday, 20 March 2010
Friday, 19 March 2010
Shaman NPC
Tuesday, 16 March 2010
Spouting Water
Outlast Music Demo
Got some exciting news, i'v just recieved a music demo from our sound guy Steve Thomas! Here it is and let me know what you think:
Or Youtube:
http://www.youtube.com/watch?v=l7J_lBWKPpk
Or Youtube:
http://www.youtube.com/watch?v=l7J_lBWKPpk
Particles system / New pillars.
Ok haven't posted in a few days, been busy with the project. I got a couple of screenshots to show you. I created a particle system for the ruins which look a little like fireflys wizzing about, textured several new pillars which Ross modeled, improved a few old textures, made the lilies interactive and modified the vertex shader for the lilies so they now bob up & down in the water. Later today I will upload a video to show off all the moving/interactive elements.
Friday, 12 March 2010
Lilies
Thursday, 11 March 2010
Water shaders!
Woot, we have just hit the 50 post mark in blogs. Thats more than 1 post a day since we started the blog! Anyway, back to the reason for blogging, today I fixed a few issues with the killzones when the player falls off the islands, this is to give the illusion that the player will fall forever. I also spent most of the day building a water shader for the bathing area, on top of that I also built a water shader for the rocks in the bath with a few splash effects, the aim was to simulate water trickling down rock faces. You will also find that the water is interactive, this was achieved by using a fluid actor and a water volume. The water has realtime reflections, although realtime reflection can be expensive, I have done my best to optimize the shader. Depending on the overall endgame performance I could always make the reflections static. Heres an SS:
Sorry for the lighting, I havent focused on it yet, it will be one of the last things I do. But we are planning to add more light elements (Stone Torches) within the ruins. Not only that but I havent rendered this game using lightmass yet, which should improve lighting 10 fold, I'll be running tests with lightmass tomorrow.
New Building
Wednesday, 10 March 2010
New Ruin Section.
This shows the new postprocess material in the new bathing section, I'm working on a water shader at the moment. Always trying to improve it, sometimes not for the best but I think we are getting there.
*EDIT - Ok after mucking around with the material I fixed an issue where the fog stopped effecting the terrain which had been turned black. I have also incorporated a very slight grad to the camera, this grad only effects the skybox. The grad should help frame the picture by darkening the very top of the screen:
Yet more post processing.
Today me and Ross discussed ideas for new assets, we also recoloured the scene through post processing and added a visual effect with the ability to darken objects the further it was from the player, this give the impression that the horizon is silhouetting. In order for the skybox to not be affected we created a mask that stopped the darkening after a certain distance, far enough to cover the terrain but small enough to let the skybox do its job.
Tuesday, 9 March 2010
Ruins Ingame.
Ruin Labyrinth Concept
Monday, 8 March 2010
Bridge
Hey, today i have spent most of time modelling the rope bridge that will be place in various locations throughout the level.
I have also been looking at how we can give the give a natural movement to the bridge, by using physics within unreal. There seem to be some good techniques, although there's a few issues, such as player interaction, that may need scripting to solve.
Fixing the normals
Just finished adjusting all the ruin normal maps, the technique I used allowed me have greyscale masks ontop of a master rock material, by combining the masked normal with the rock normal I can tile up the rock texture to get high detail while minimising the memory size. Although in the process of multiplying the two normal maps they made the material flatter, to fix this I had to multiply the R & G channel of the normals by about 5.
Sunday, 7 March 2010
Post Processes Fog
So done a bit of tweaking today, modified a few ruin textures. I also figured out how to add post processing material to the game, Iv replaced the old fog with this new post processing one. The new fog will not wash out colours until a certain range, provides more contrast and depth, I also added an effect that colours and desaturates after a certain distance, again this will help give added depth.
Saturday, 6 March 2010
Post Processes
Found this interesting link to use post processing to enhance depth and help colour balancing:
http://www.daveprout.com/hack-this/2010/1/18/material-post-effects-lab-distance-color-blending.html
On Sunday im hoping to modify this to produce a fog that provides more depth as im not happy with the current fog within our game. Will be posting screenshots when I get the results ;)
The are a few other interesting articles in that blog too, including how to achieve outline detection using post processing, which may help give Outlast a kl unique look.
Friday, 5 March 2010
Test Ruins
This is a test to see if all the ruins pieces fit together, in which I havent had any major problems, everything seems to be going smoothly. Haven't decided on the zone colours yet, but will focus mainly on getting everything positioned correctly and lit first. Today me and Ross have decided on the floor plan for the ruins section, I will be slowly building this section up and will post screenshots on my progress.
Ruins
Havent been posting recently, mainly because I'v been busy trying to finish the ruins section. I'v started testing all the finished pieces to make sure they fit ok, so far so good. I'll have a screenshot up later today.
Tuesday, 2 March 2010
Entrance Model
Wall section.
Monday, 1 March 2010
Ruin Centre Piece.
Vertex baking in maya.
*Edit - False alarm, ambient occlusion was automaticly enabled in the post processing volume leading me to believe the vertex bake worked, which it didnt. Im still trying to find a way to achieve this. After playing around with Maya a little bit I now know how to bake vertex information, although I cannot seem to bake ambient occlusion directly onto vertices.
Subscribe to:
Posts (Atom)